Google Slides: Loop Video in 2 Ways
May 31, 2023
Do you want to know how the Google Slides loop video works?
Multimedia presentations in classrooms can increase engagement. You can make them even more interesting by learning to loop videos in your slides.
In this blog post, we will go through the following:
-
Loop a Google Slides presentation without publishing
-
Loop your Google Slides when you “publish to the Web”
-
Frequently asked questions about looping a Google Slides presentation
Loop a Google Slides Presentation Without Publishing
To enable the loop option on your Google Slides presentation, here's what you have to do:
-
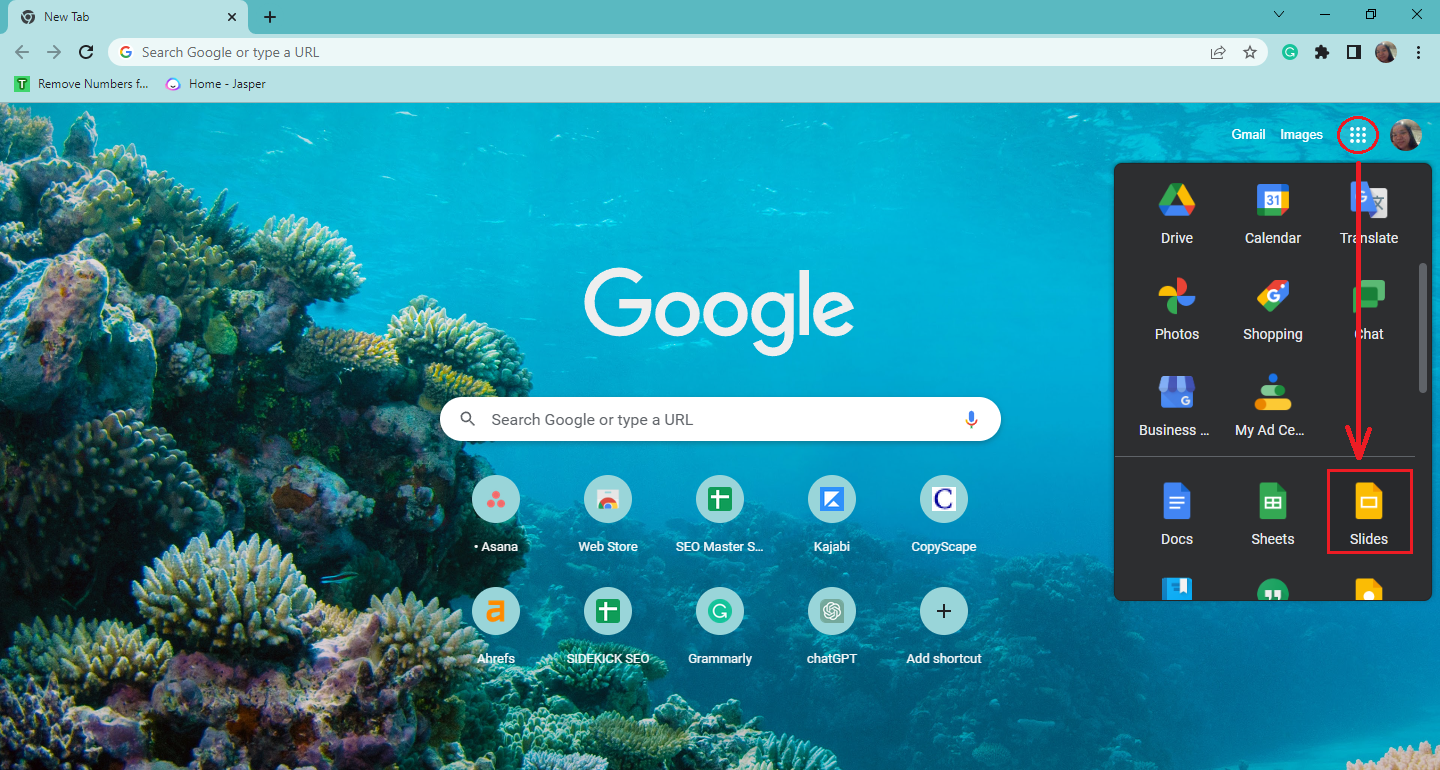
On Google Chrome, click Google Apps and select "Google Slides."
-
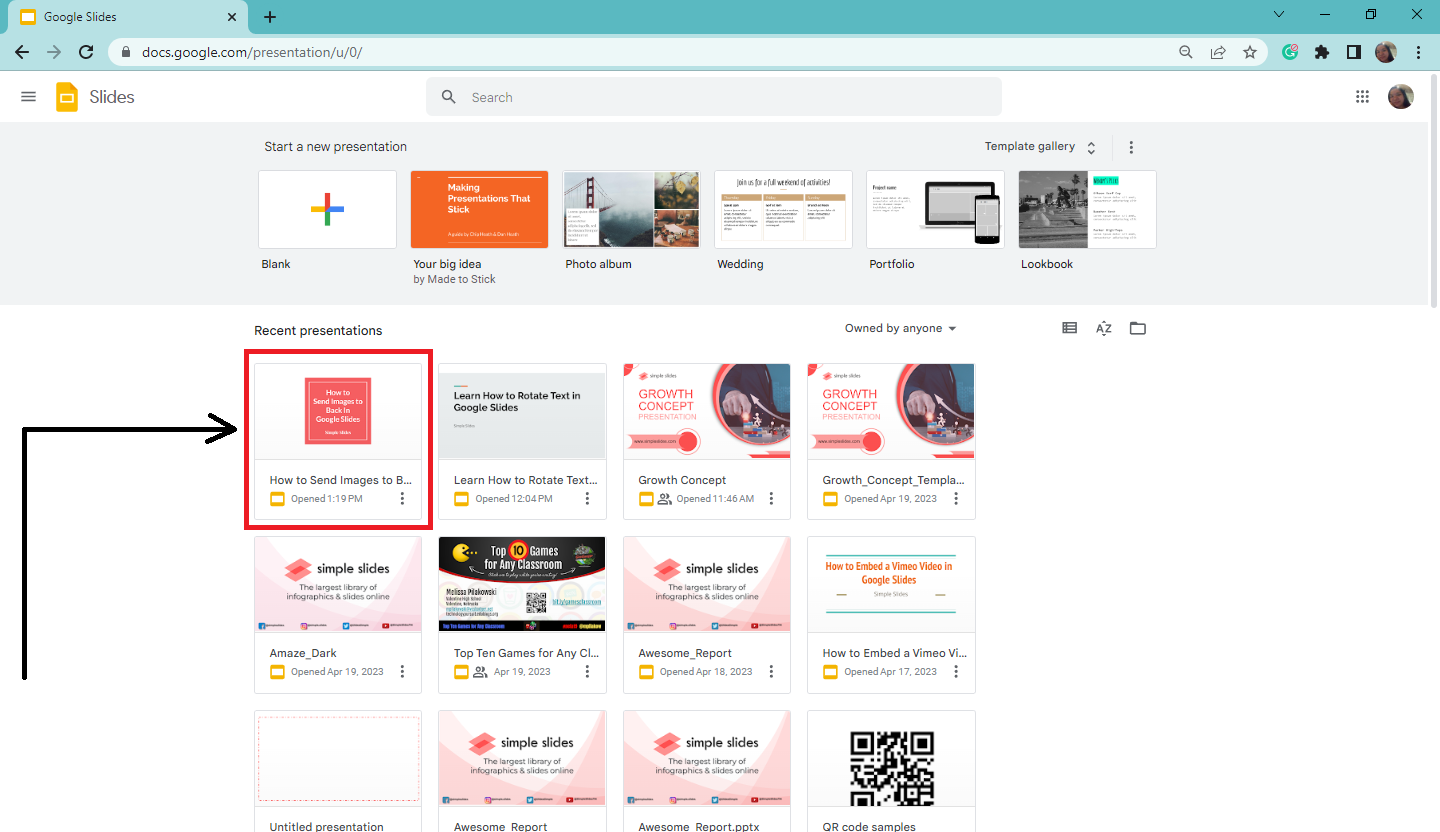
Select an existing presentation where you want to use the loop feature.
-
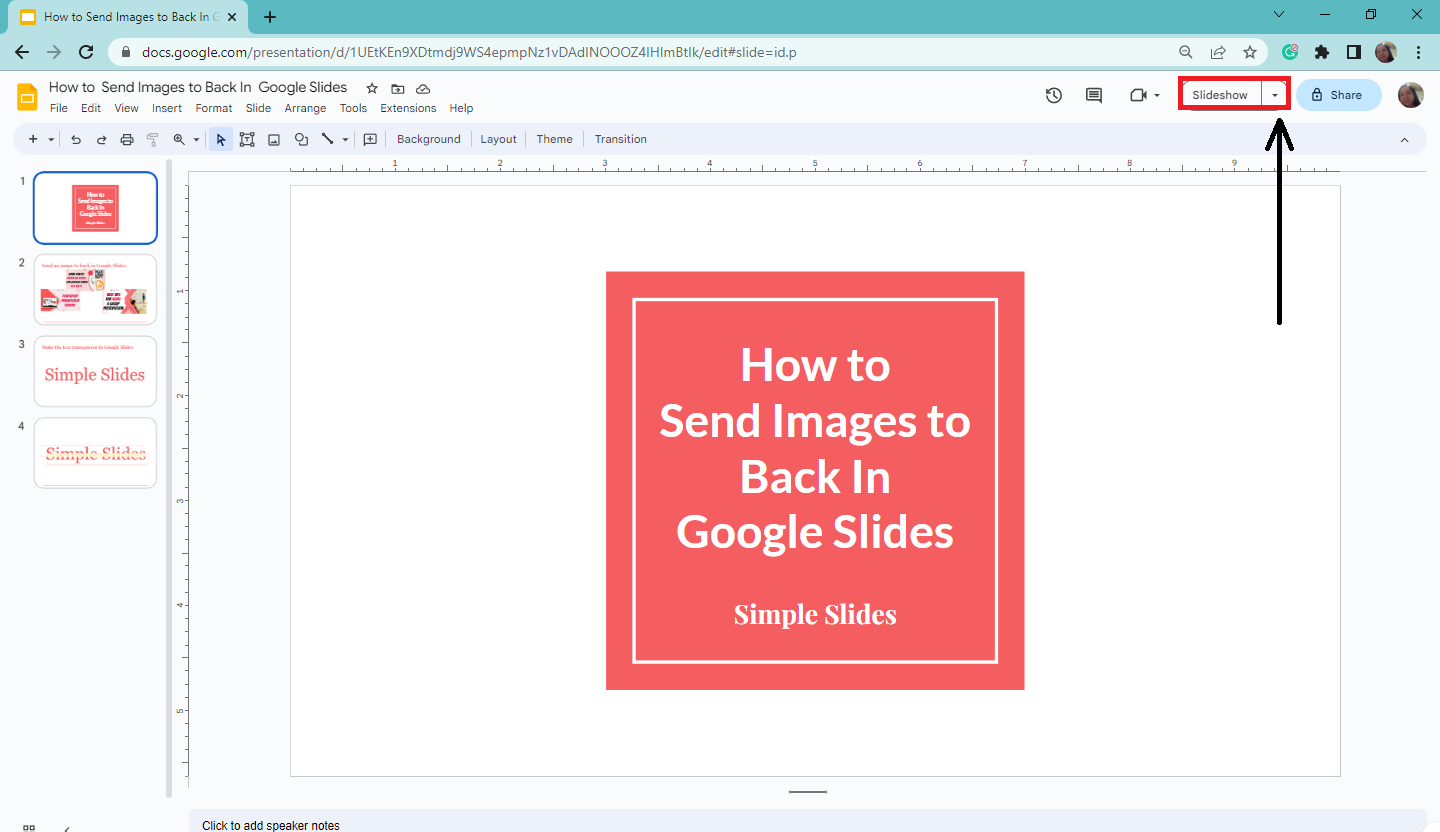
At the upper-right corner of your Google Slides presentation, click the "Slideshow" button beside the "Share" options.
-
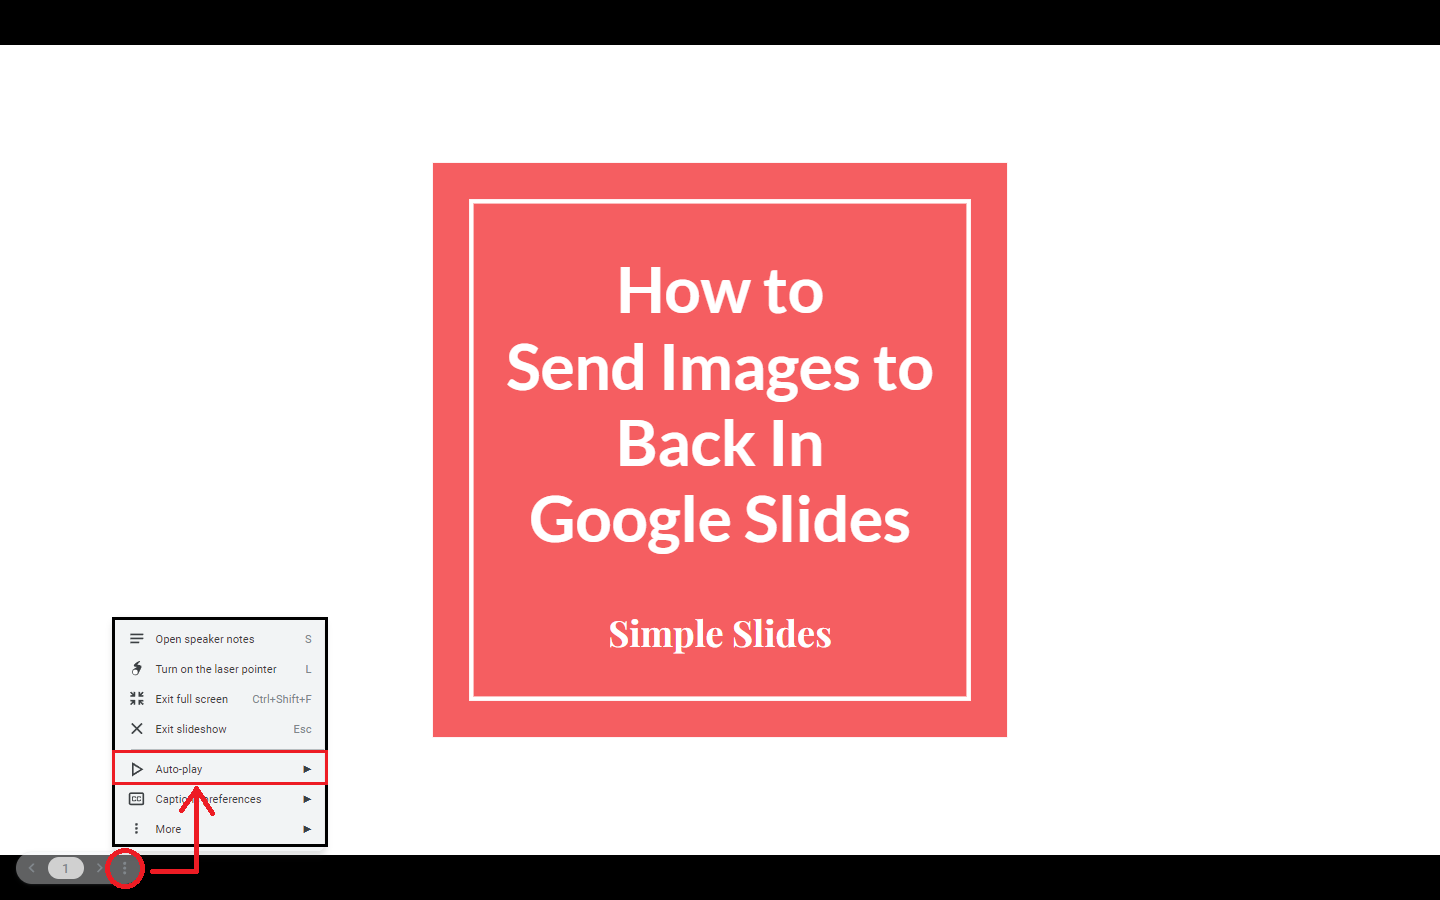
Navigate to the lower-left corner of your presentation, click the three-dot icon, and select "Autoplay" from the pop-up menu.
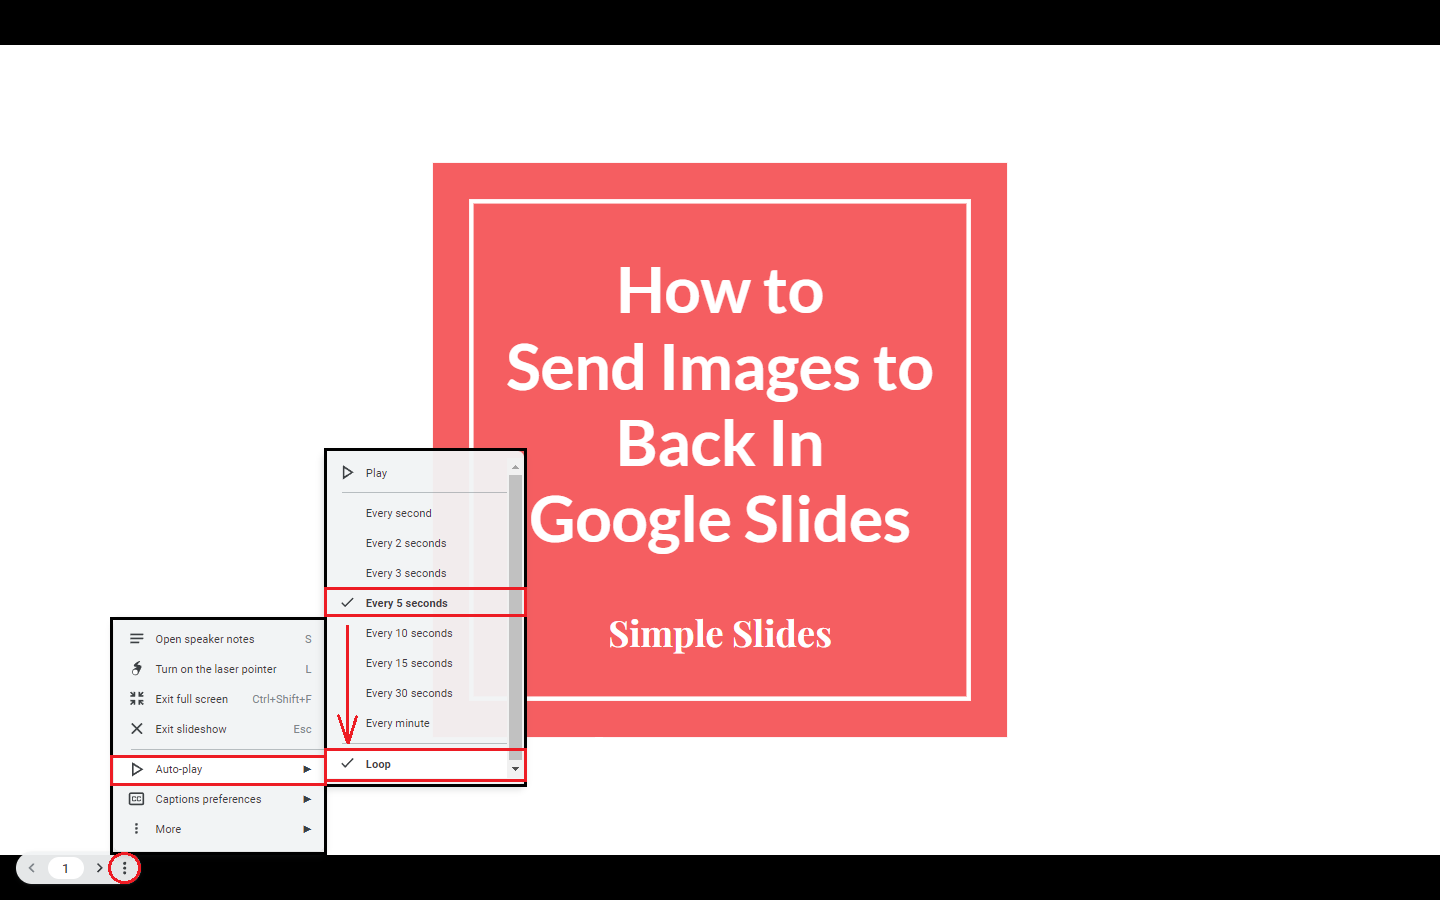
From the "Autoplay" option pop-up menu, choose a duration for each slide of your presentation and click "loop."
-
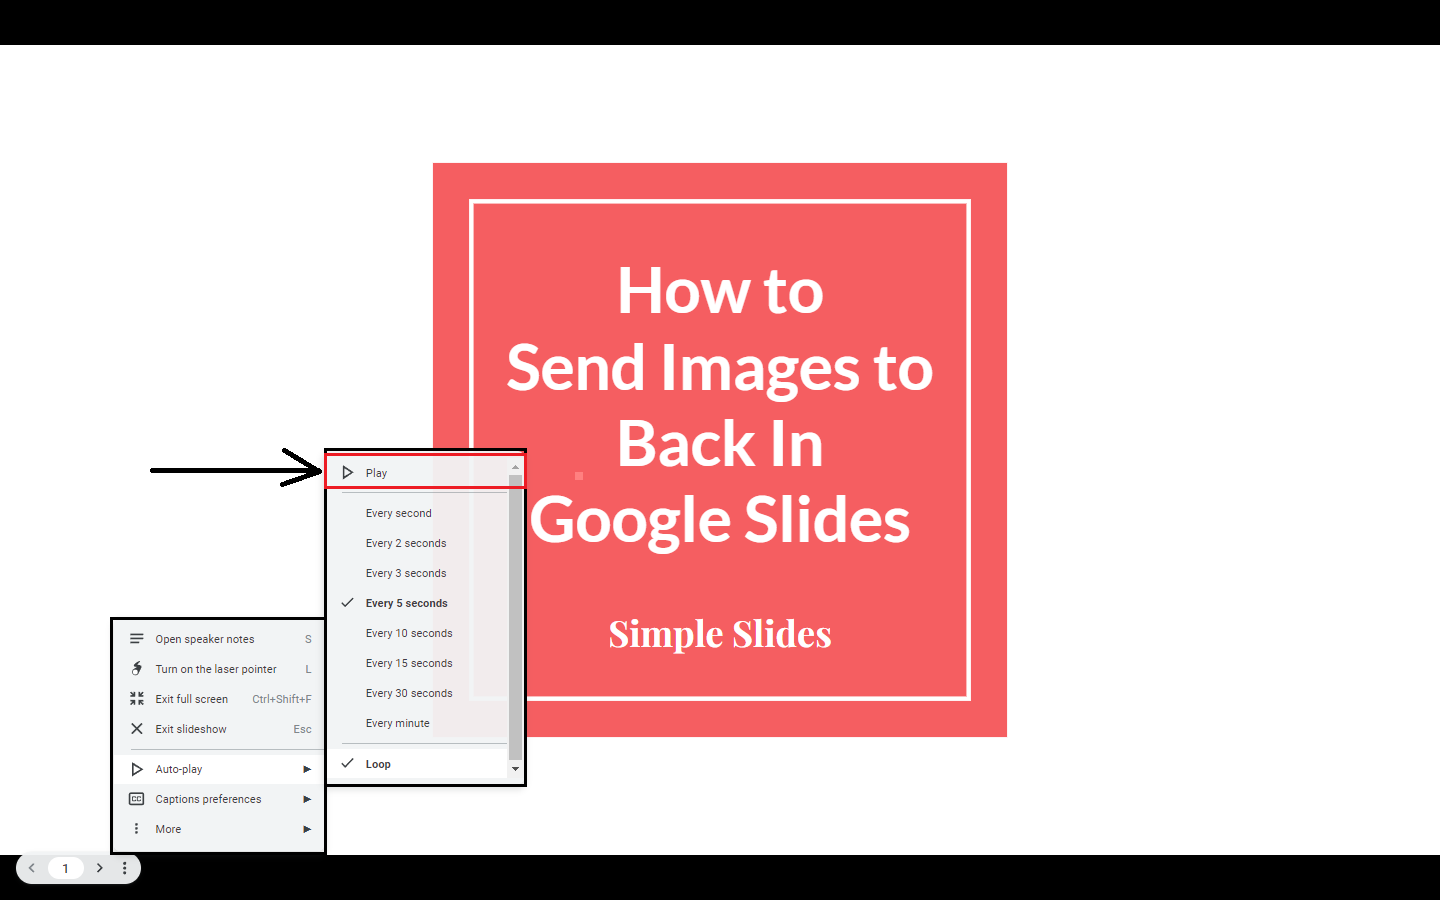
To check that your presentation is looping properly, click "Play."
You can also check out our post on how to loop Microsoft PowerPoint.
Loop Your Google Slides When You “Publish to the Web”
Another way to loop your slides whenever you reach the end of your presentation is by using "Publish to the Web." Here are the steps:
-
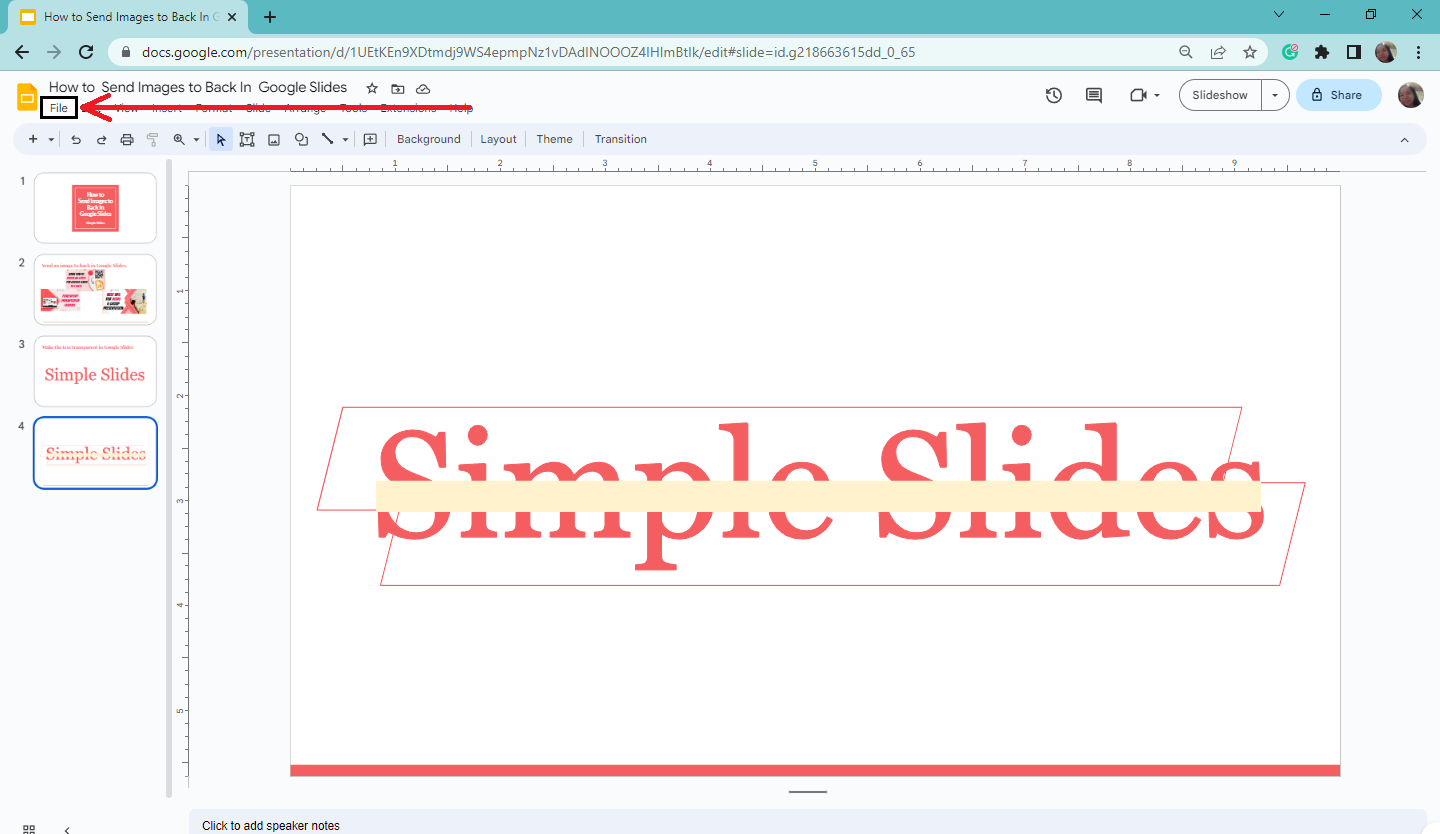
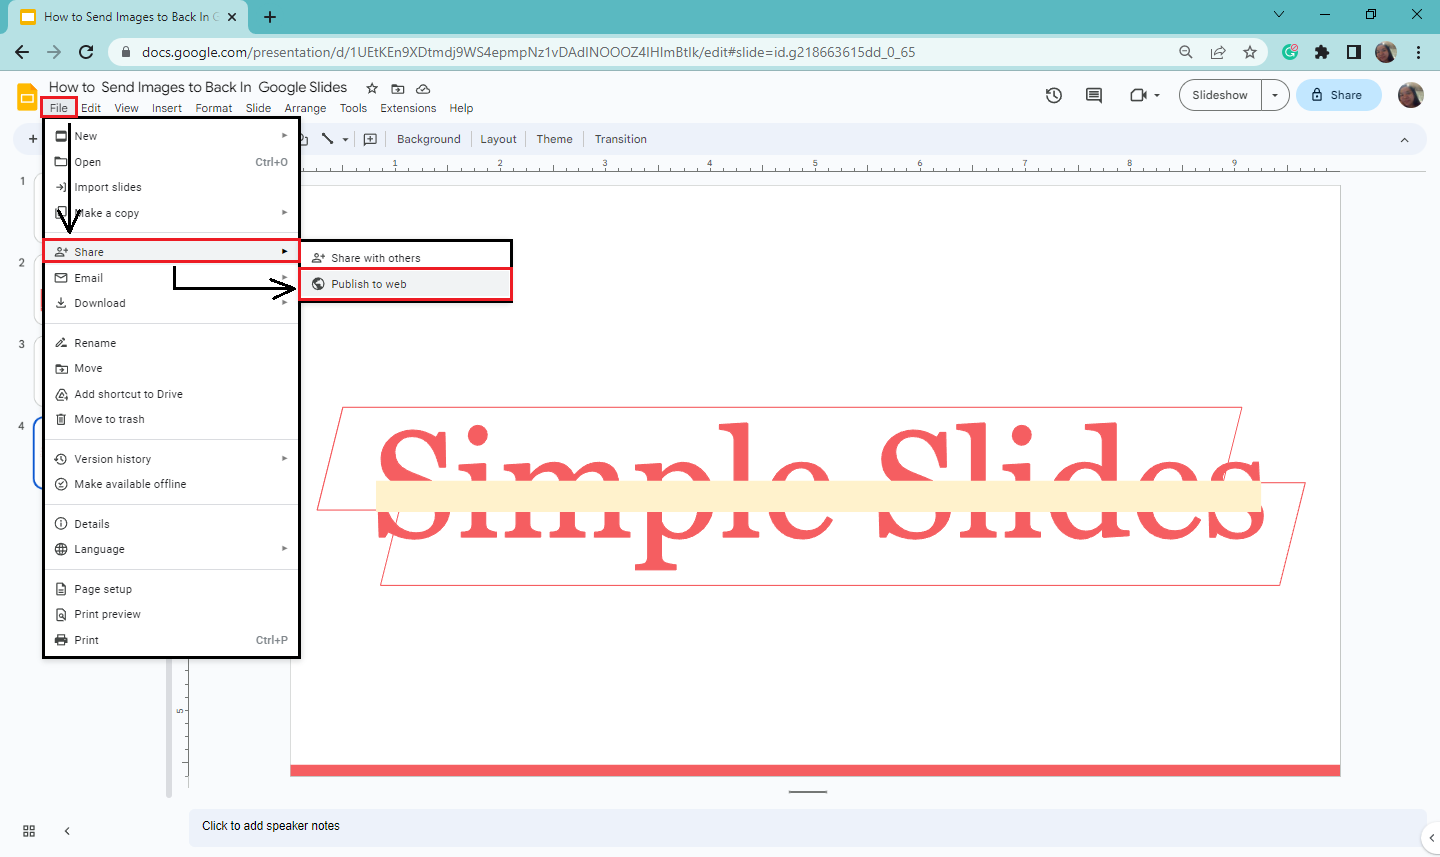
Open your Google Slides presentation and click "File" on the menu bar.
-
Select the "Share" option from the drop-down menu and choose "Publish to the Web."
-
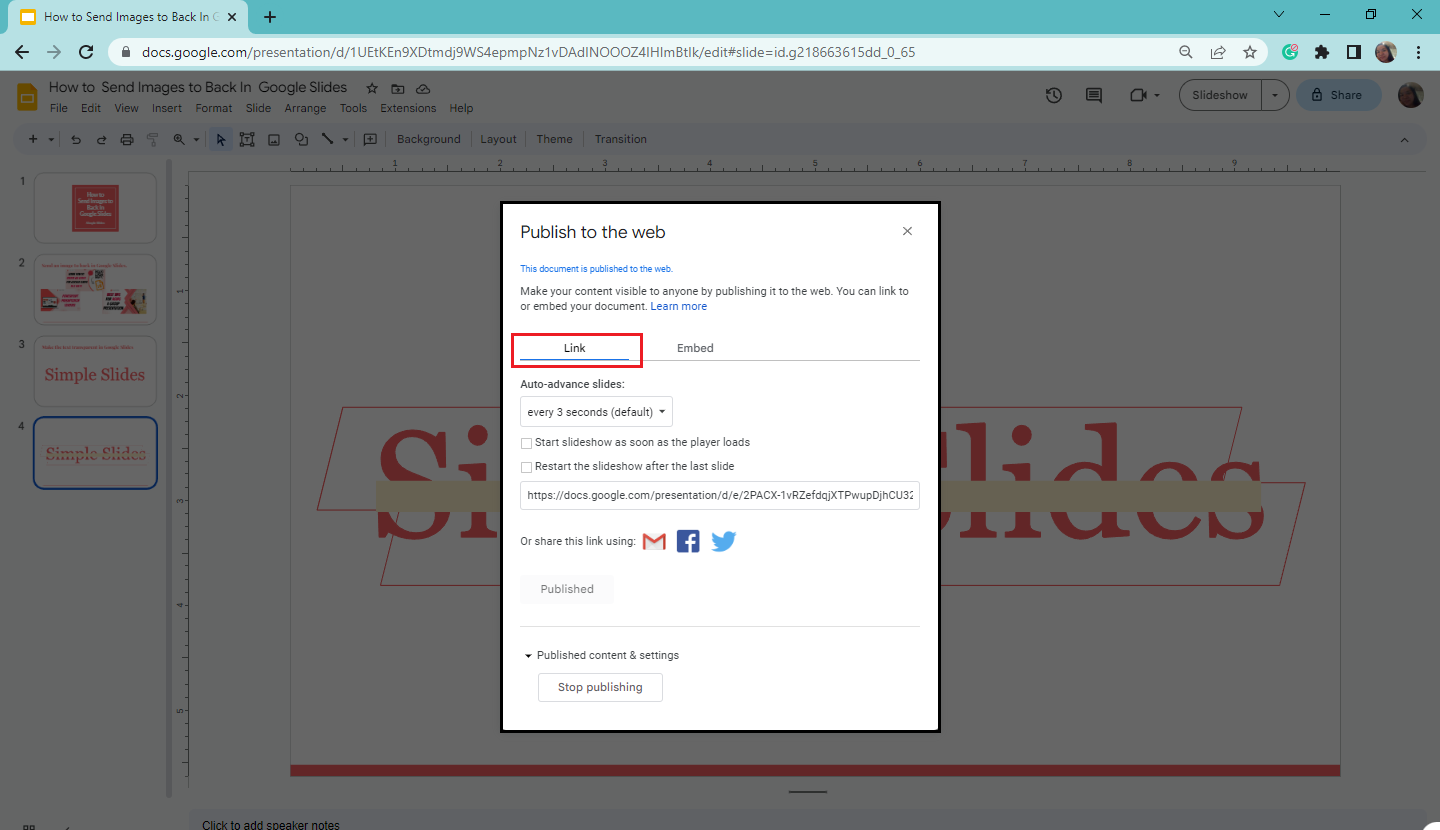
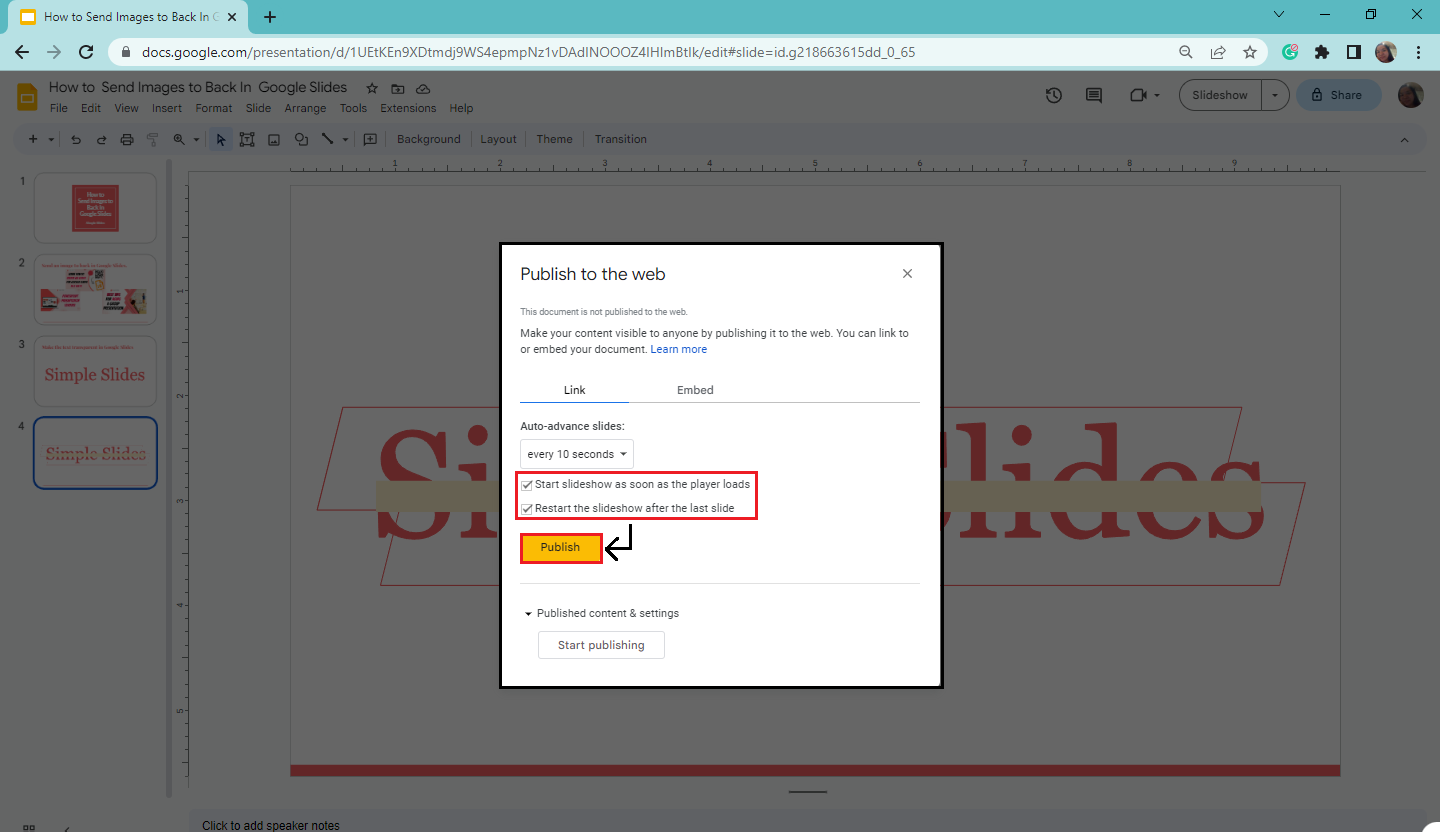
When the "Publish to the Web" window appears, click the "link" tab.
-
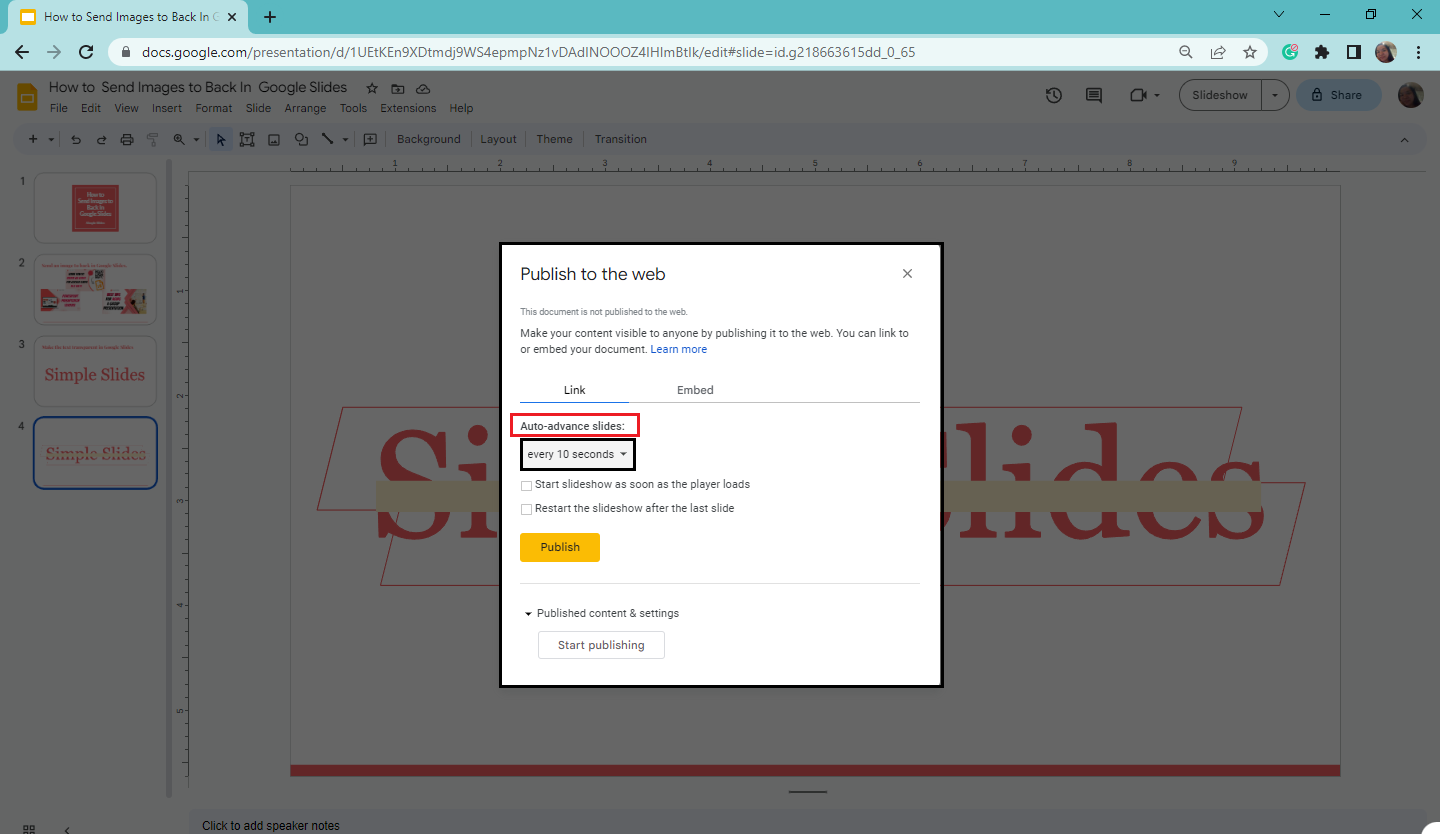
Under the "Auto-advance slides," choose the playing duration for each slide.
-
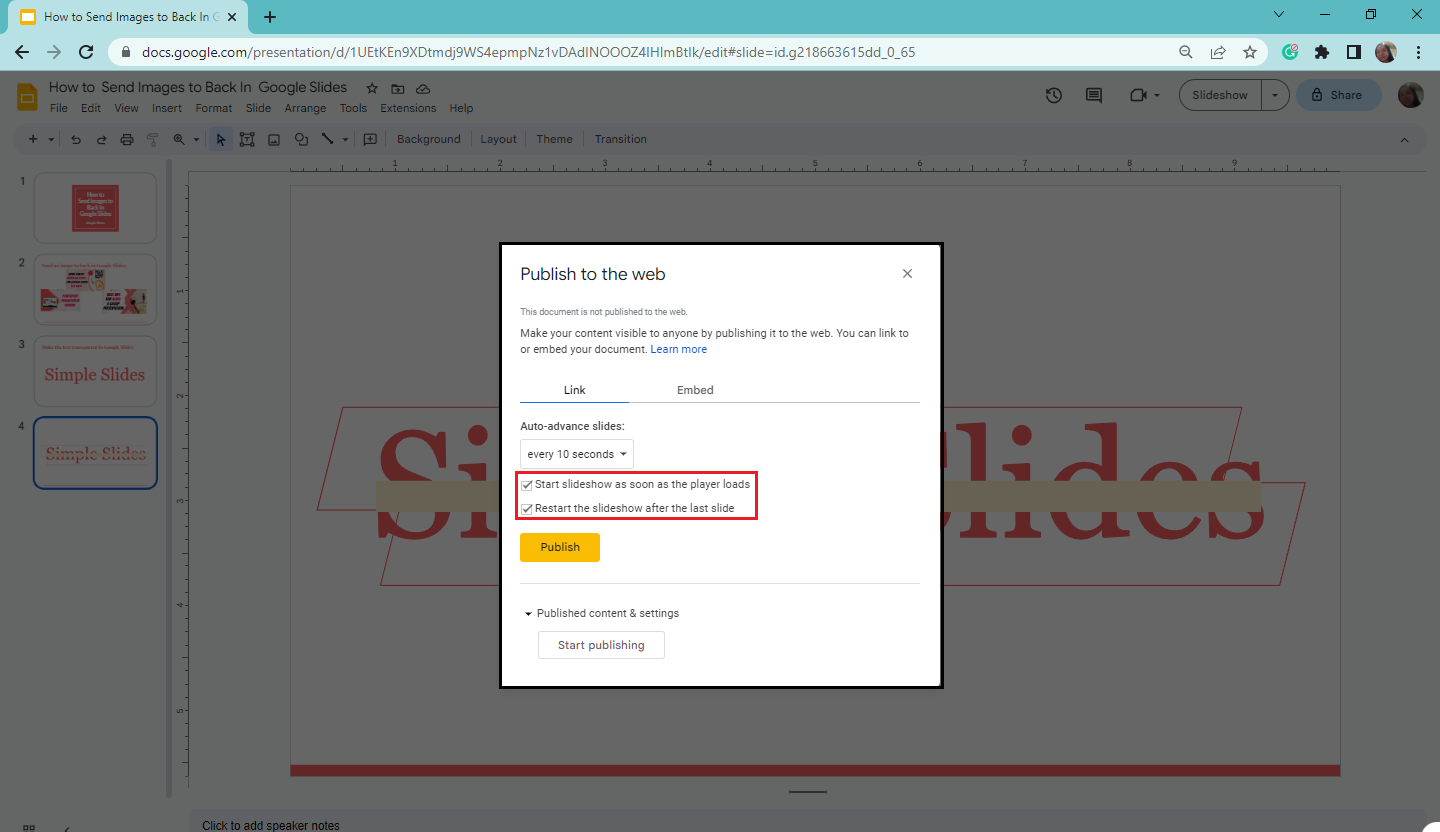
Then, select the boxes beside "Start slideshow as soon as the player loads" and "Restart the slideshow after the last slide."
-
After marking each box, click the "Publish" button to get the link for your embedded slideshow.
Note: Learn how to embed Google Slides for more detailed instructions.
Final Thoughts on How to Loop Google Slides Presentations
Learning the above methods lets you easily auto-play and loop your Google Slides. Knowing this essential Google Slides feature helps you deliver an effective presentation without the hassle of clicking to get to the next slide.
Elevate your next presentation by accessing over 2,000 Google Slides icons. Don't forget to follow Simple Slides on Facebook for more tips.
Frequently Asked Questions About Looping a Google Slides Presentation:
What are the keyboard shortcut keys to open the "File" menu?
To open the "File" menu using shortcut keys, press Alt + F or Alt + Shift + F.
What is the benefit of marking "restart the slideshow after the last slide?"
By marking the box beside "restart the slideshow after the last slide," you enable automatic looping for your presentation.
What are the benefits of publishing your presentation on the web?
The following are the benefits of using the "Publish to the Web" feature in Google Slides:
-
It makes your presentation more interactive
-
It improves time-efficiency
-
It enables compatibility for any users
-
It lets you connect to a broader audience
Related Articles:
Business Presentation: Tips and Guides
8 Best Presentation Ideas For Interviews
What Is a Presentation? Everything You Need To Know
Get A Free Sample of Our Award-Winning PowerPoint Templates + University
Get A Free Sample of Our Award-Winning PowerPoint Templates + University
Join our mailing list to receive the latest news and updates from our team.
Don't worry, your information will not be shared.
We hate SPAM. We will never sell your information, for any reason.


