Google Slides: Send To Back An Image
May 04, 2023
Are you ready to discover how the Google Slides 'send to back' feature can help boost the visual appeal of your presentation?
Today, you'll learn how to create organized visuals in Google Slides using the "send to back" feature.
In this blog post, we will go through the following processes:
-
"Send to back" an image via the Arrange tab
-
“Send to back” an image via the right-click menu
-
Frequently asked questions about the Google Slides "send to back" feature

"Send to Back" an Image via the Arrange Tab
To learn how to use the "send to back" feature in Google Slides, follow these steps:
-
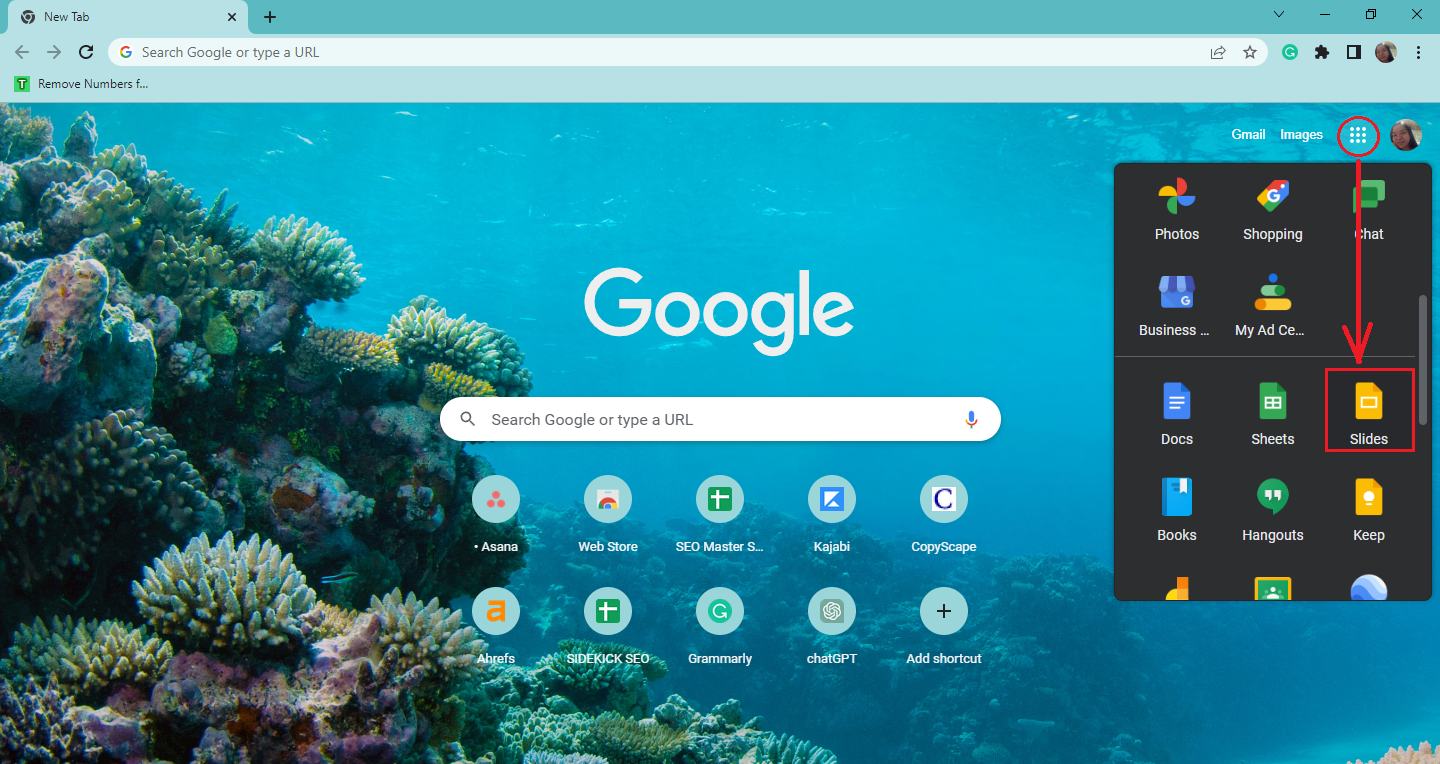
Open Google Chrome and click the "Google Apps" icon. Select "Google Slides" from the options.
-
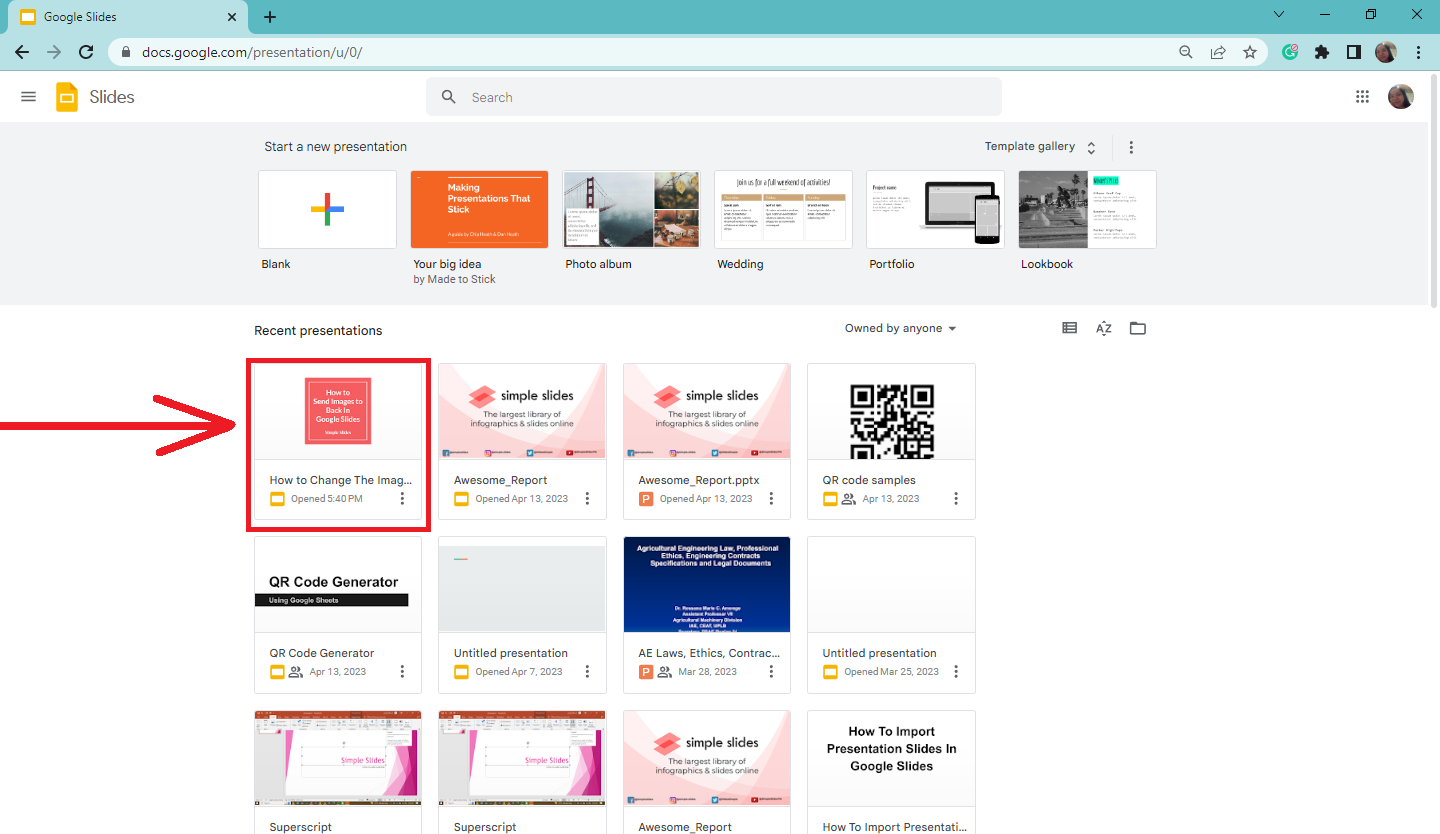
Choose the existing presentation with an image you want to "send back."
-
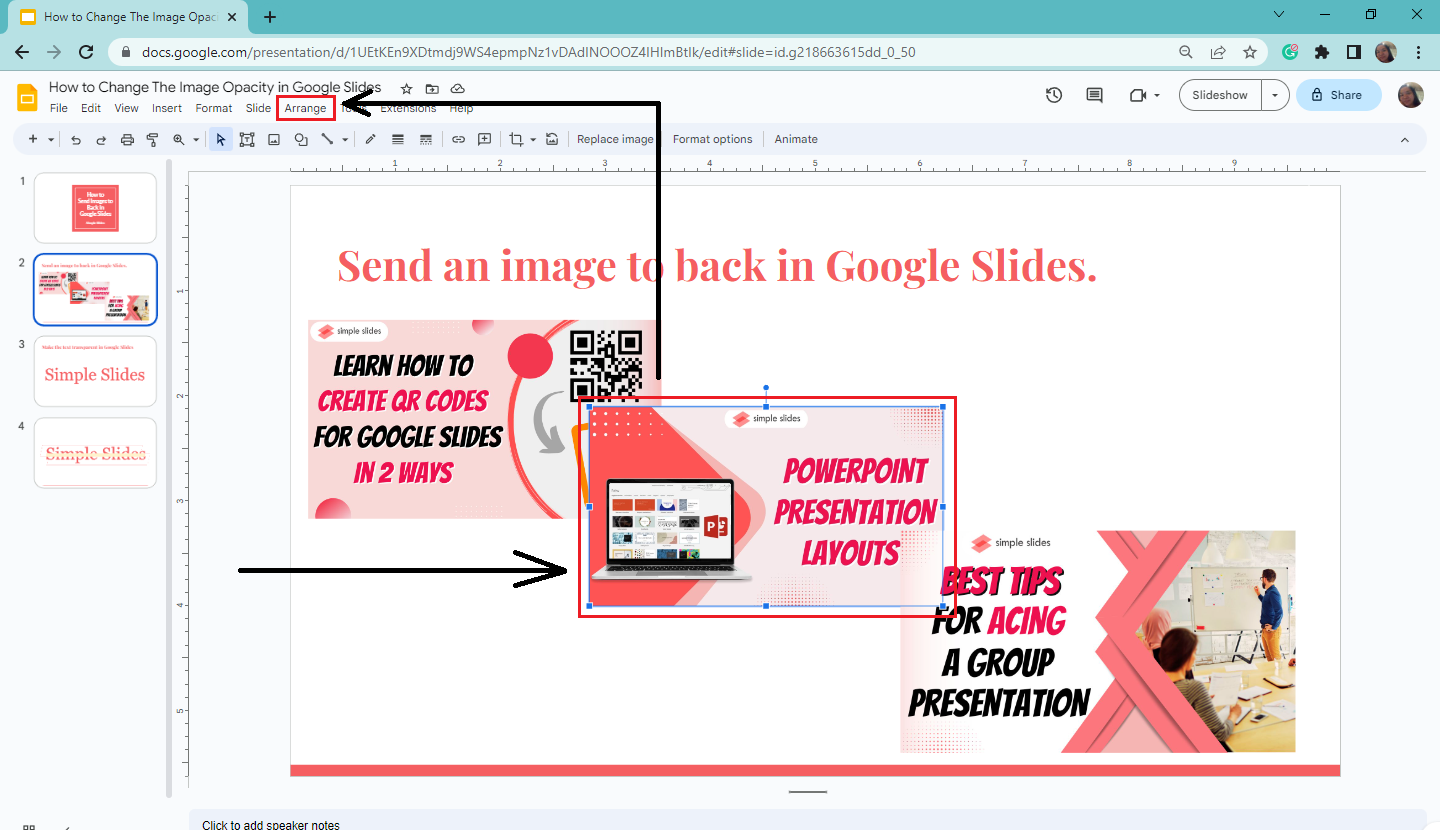
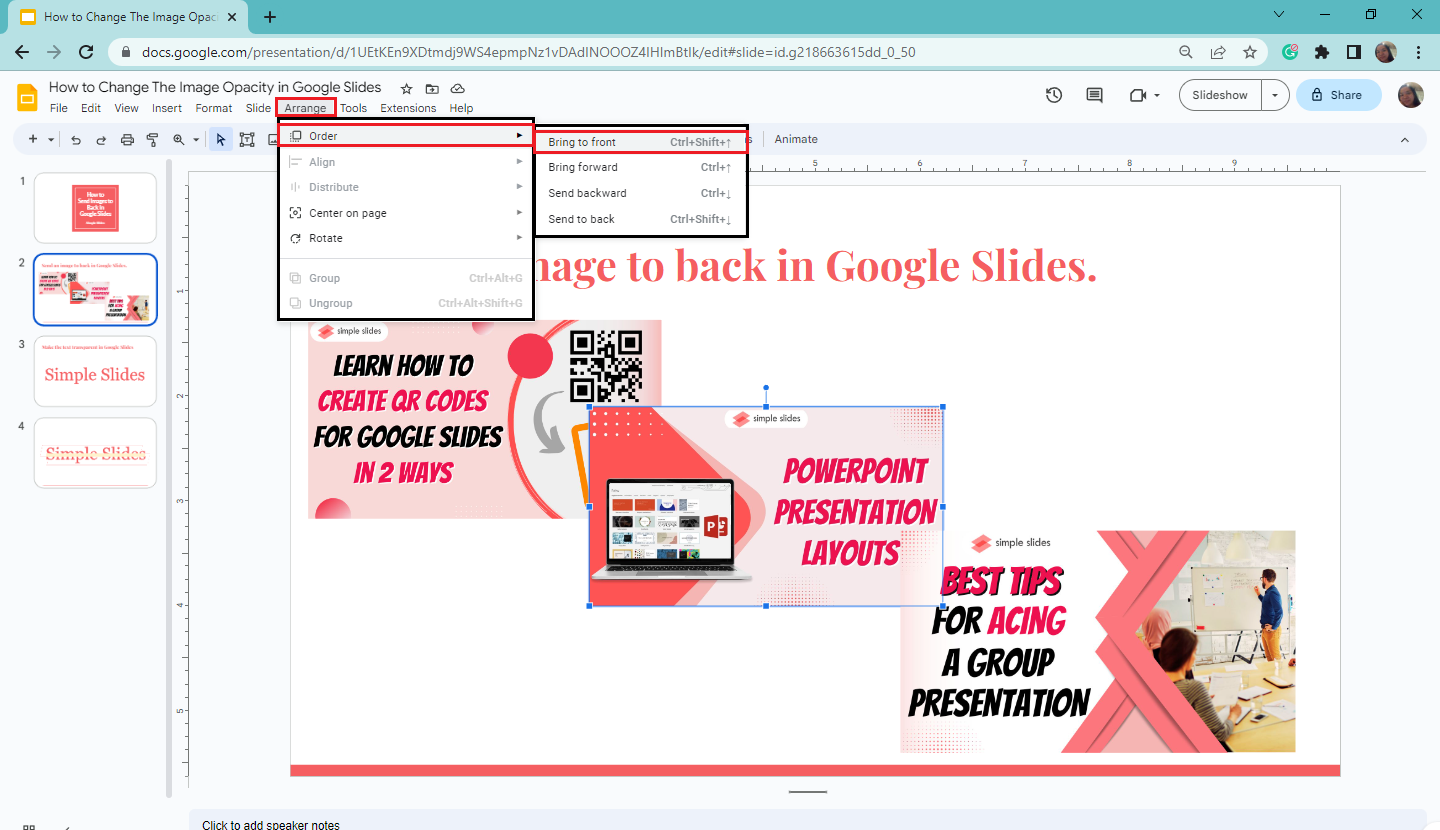
Then, select the image and click the Arrange tab.
-
Select "Order" from the drop-down menu, and click "Send to back."
-
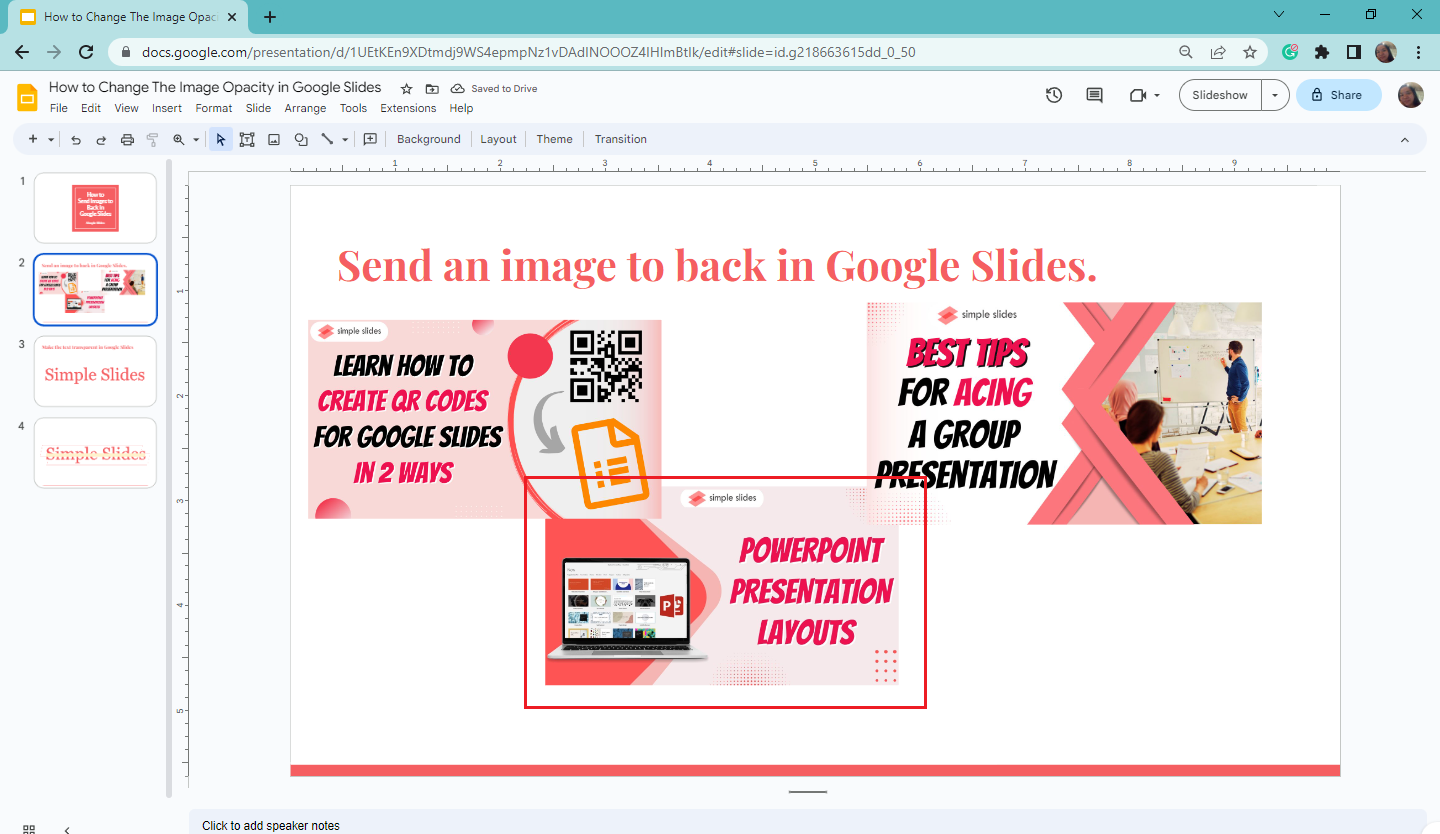
After clicking "Send-to-back," adjust and move your picture to your preferred location.
“Send to Back” an Image via the Right-Click Menu
Another way to send an image behind a text box is by right-clicking. All you need to do is:
-
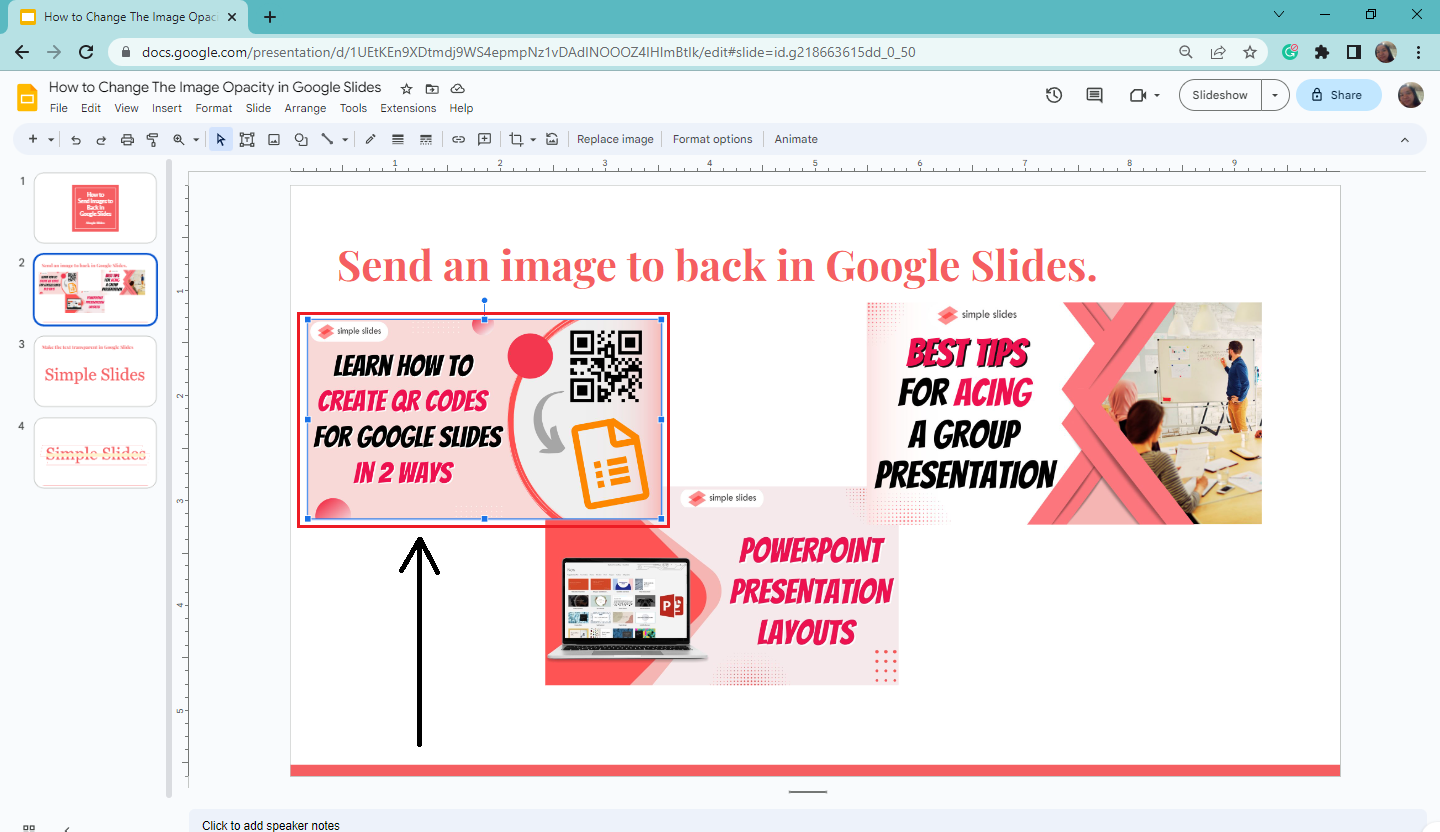
On the same slide, select a particular image.
-
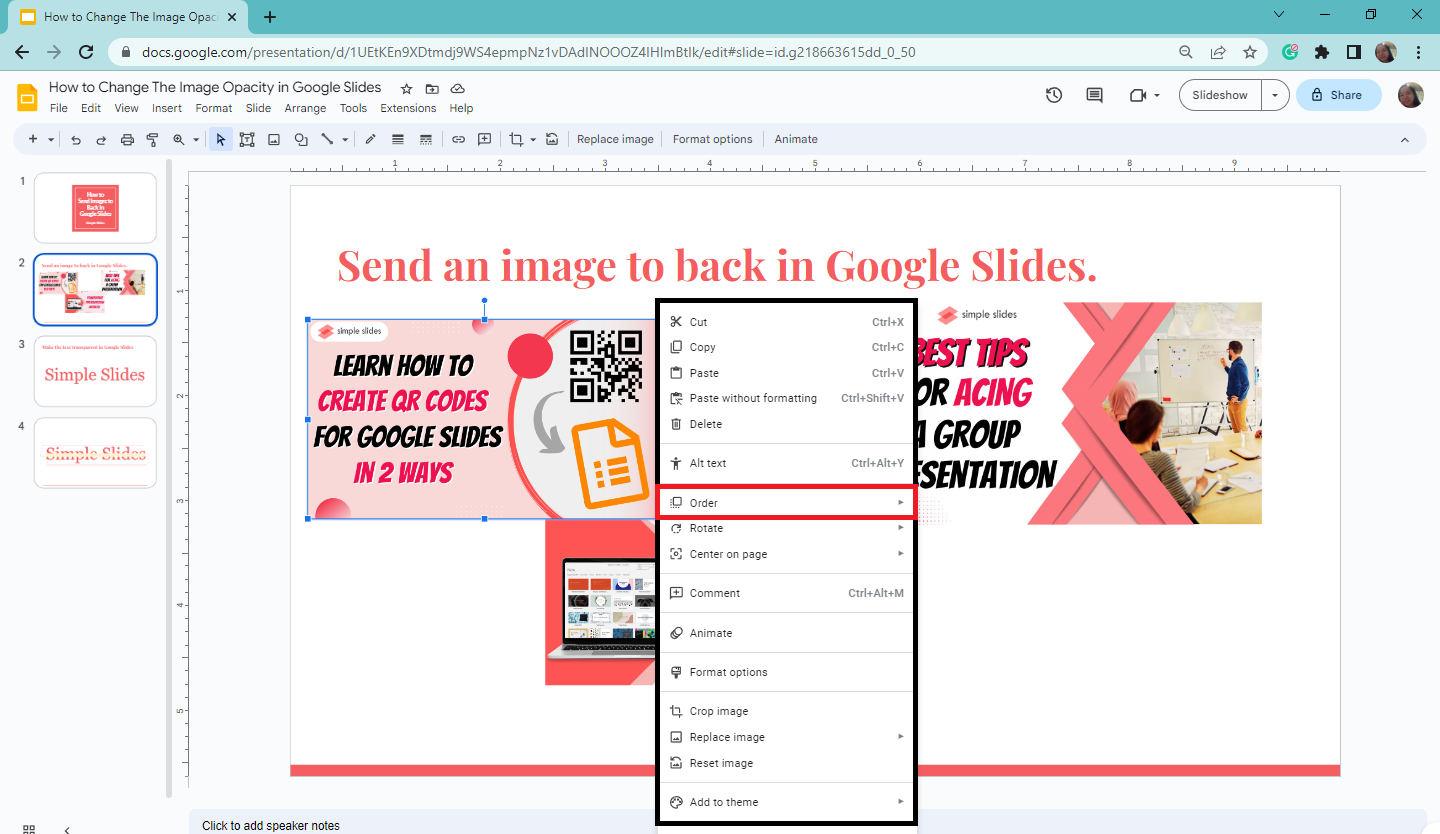
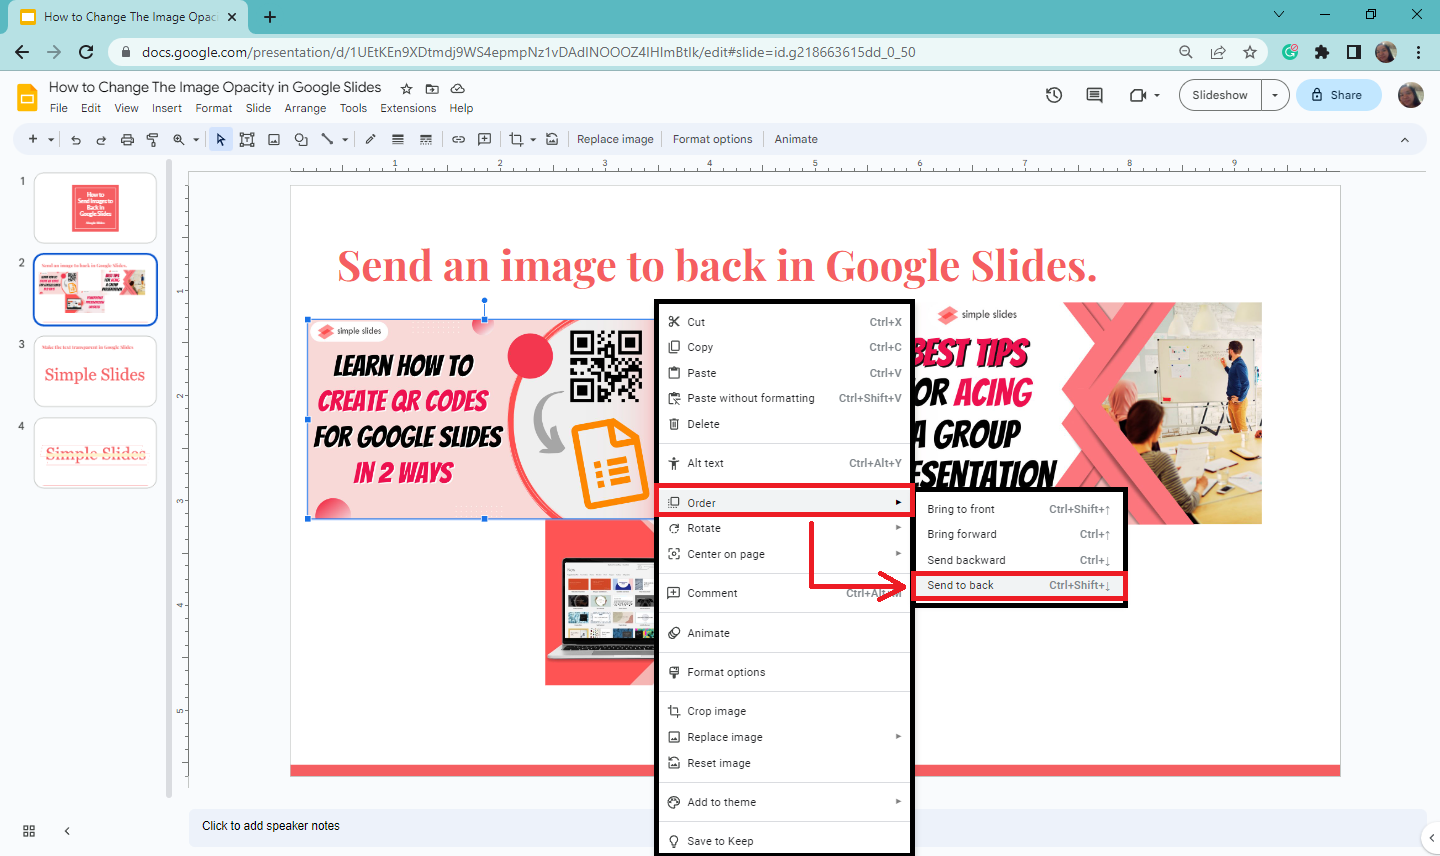
Right-click the picture, then select "Order" from the options.
-
Click "Send to back" on the context menu.
-
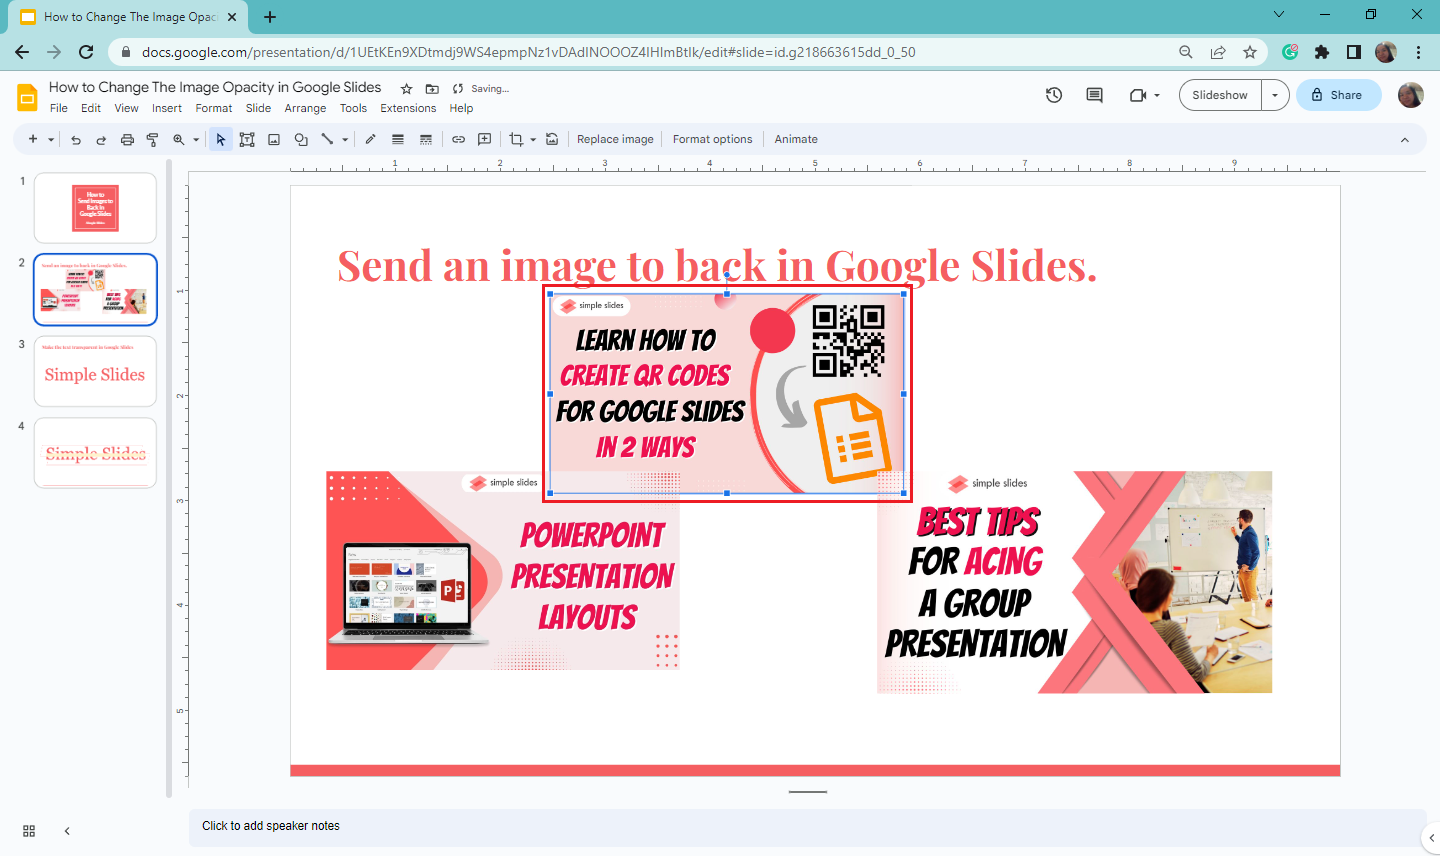
Once you've clicked "send to back," adjust and move the picture to your desired location in your Google Slides presentation.
Note: To bring the image "in front" of another picture, you must repeat Steps 1-3. Then, instead of selecting "Send to back," choose "Bring forward."
Final Thoughts on Google Slides: Send-to-Back
Following the steps above, you can easily manage the image and object layering in your Google Slides presentation. Besides, the "send to back" feature makes your images look organized.
Visit Simple Slides for more how-to blog posts about Google Slides and Microsoft PowerPoint. Subscribe to the Simple Slides YouTube channel for presentation tutorials!
Frequently Asked Questions about the Google Slides "Send to Back" Feature:
What are the shortcut keys in sending an image back?
Press Ctrl + Shift + Down arrow to "send to back" images or text box in your Google Slides presentation.
What is the significance of using "send to back" in Google Slides?
The benefits of using the "Send to back" option in Google Slides are:
-
Highlighting the main point of your presentation
-
Keeping your visual elements organized
-
Avoid overlapping images in Google Slides
What are the shortcut keys in "bringing images forward"?
The shortcut keys in bring forward are Ctrl + Shift + Up arrow.
What is the difference between "send backward" and "send back"?
Selecting the "send backward" option lets a particular object go a step behind its current position. In contrast, the "send to back" lets you send the object farthest back.
Related Articles:
How To Make Google Slides Vertical: A Step-By-Step Guide
Background Music For PowerPoint: A Step-By-Step Guide
Get A Free Sample of Our Award-Winning PowerPoint Templates + University
Get A Free Sample of Our Award-Winning PowerPoint Templates + University
Join our mailing list to receive the latest news and updates from our team.
Don't worry, your information will not be shared.
We hate SPAM. We will never sell your information, for any reason.


